
Mobile cameras are getting better and have more options, but with these three settings we can greatly improve our photos without complicating our heads. Here they go:
Use the best sensor and the brightest lens on our mobile phone
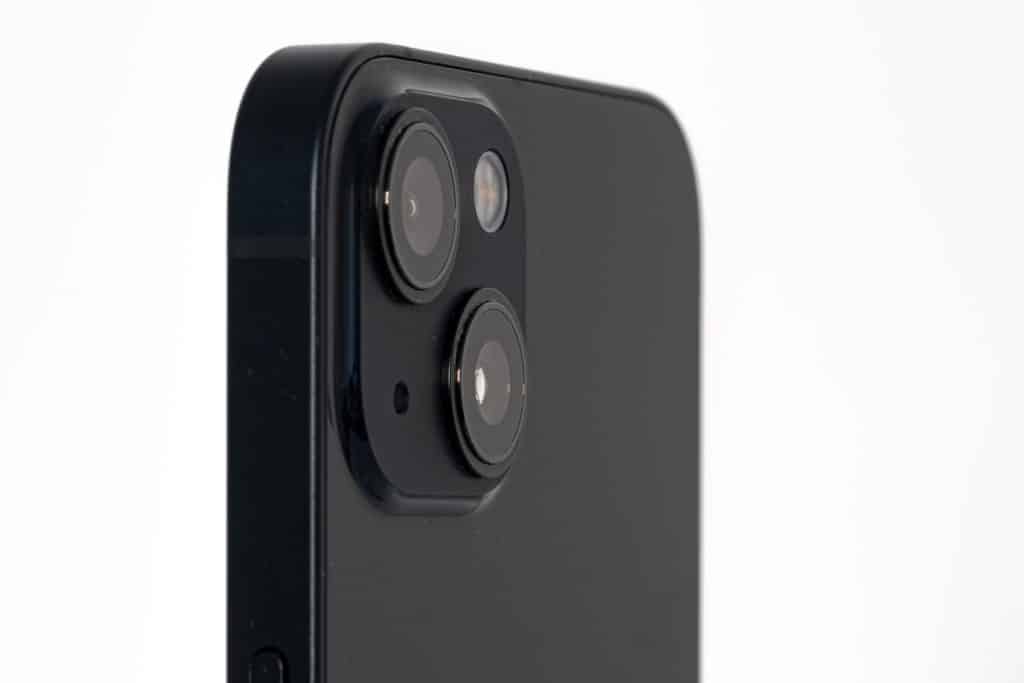
Current mobile phones have at least two targets associated with two sensors. For reasons of space and optics, they cannot be the same. Normally, the main sensor is given prominence with its corresponding objective.
Difference in quality between the main camera and the wide angle
Well, if we always want the highest quality, the best result in night scenes and the least amount of noise possible, we should shoot with the largest sensor that our mobile has.
José María Mellado wrote the photography books of a generation, and now he has switched to his mobile phone: “He does not come to compete, but to give us more freedom.”
We have all the data we may need about any mobile phone, including the size of the sensors, when the manufacturer gives the data, of course. And if we want to be sure, all you have to do is download Aida64 and in Devices>Camera ID we will find the exact model of sensor.
Aida64
Price: Free
Download: Android
Download: iOS
Nowadays the sensors start to be 1″, but they usually measure between 1/2.55′′ and 1/3.4′′ of those associated with a telephoto lens. The larger the divider, the second figure, the smaller the sensor.
But we can check the quality ourselves. We do as many shots as sensors our smartphone has and then compare the photographs at 100% of their size. You have to look at the noise, the areas of light and the shadows; and if you want to go further, what the sharpness looks like in the corners. You will get more than one surprise.
In this case we only have to take two photographs to see what is the best combination.
In addition, with the number of pixels that the main sensors of mobile phones now have on average, then we can cut out without problems to achieve the appearance of a photograph taken with a telephoto lens.
Choose the RAW format when there is good light and HEIC when it is scarce
This is going to be a little unpopular, because it is not practical. Unless you have a high-end phone such as an iPhone 13 Pro. It all depends on the light you have at any given time.

In good light, RAW is perfect.
If you are going to shoot in broad daylight, the sun enters in abundance and everything is perfectly illuminated, always shoot in RAW format, the raw format that many of us continue to use in more traditional cameras. With this format, which you can choose from in the camera settings, we have much more information and quality.
The difference between shooting in RAW or HEIC in low light
But if we are going to take photographs at night, in low-light places, it is best to bet on computational photography and take advantage of all the possibilities it offers with the jpeg or HEIC format. This way we will remove with the stroke of the pen the noise and problems that we can find in the very small sensors of mobile phones when the sun is gone.
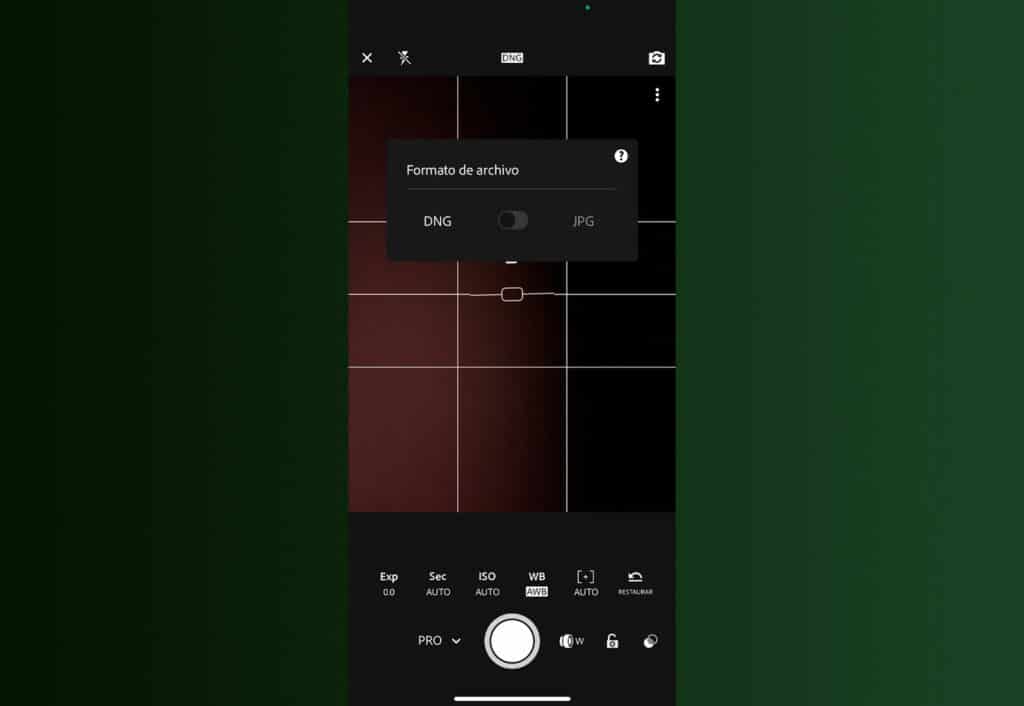
It’s very easy to change the image format
Normally, at the top of the screen you find the format in which you are shooting. If you click on it, you will be able to change format without problems, although check first if your phone is capable of shooting in RAW, because this may not be the case.
If we are lucky enough to have an iPhone 13 Pro, everything changes because it has the famous Apple ProRAW, a format that combines the advantages of both formats, raw format information and computer photography assistance.
Working with Pro mode
Another measure that may be unpopular, I know. Because it’s so comfortable to shoot and smart that it doesn’t make sense to complicate life. But if you want to take advantage of the full potential of your mobile phone, it is the best option. It requires more attention from the photographer, but the results, after practice, are much better.
You just have to activate Pro mode and control two parameters: shutter time and sensitivity. The huge advantage, and so it is very easy to handle these parameters, is that the visualization is live. That is, any changes can be seen on the screen. And you can get what you want.
With Pro mode you can darken the shadows without any problem.
Above all, you are going to play with the shutter time. If you put a slow one, you are going to capture more light; and if you put it faster, you will better capture the most intense lights, leaving the shadows more hidden.
And we will no longer depend on what the engineers have decided for you when you shoot in fully automatic mode. In this mode, shadows are usually illuminated by default. And that’s why the appearance is so unnatural.
We recommend that you try these three simple settings. You will see how your photographs improve from a technical point of view and you can start focusing on what is important, which is to choose good frames, great moments and perfect compositions.